Sales > Sales Trade Agreement > Sales Price Group Entry
Module Objective
After you have created the framework of a Sales Price Group (defining its name, period, target customers, and product list), you use this Sales Price Group Entry module to input the specific price value for each product within that group.
1. Main View (Price Entry List)
The main page of this module displays a list of all price entries that have been created for each price group.
View Explanation
This page is for viewing and managing all the price lists that have been filled in.
Filter: You can search for a specific price entry by Group Code, Item Category, or a Date From and Date To range.
Price Entry List: The table below will display all entries that have been made, with columns such as Group Code, Group Name, Date, and Sales Price Status.
Button Functions
New: The primary button to create a new price entry.
Print: To print the details of a selected price entry.
2. Steps to Input Sales Prices
Step 1: Create a New Price Entry
From the Main View, click the New button to open the Sales Price Group Entry form.
Step 2: Select the Price Group
On the form that appears, the first and most important step is to select the Group Code from the dropdown. This is the name of the price group for which you will be filling in the prices. After you make a selection, details such as Group Name, Period, Customer Category, and Available Item(s) will be filled in according to the settings you created in the "Sales Price Group Settings" module.
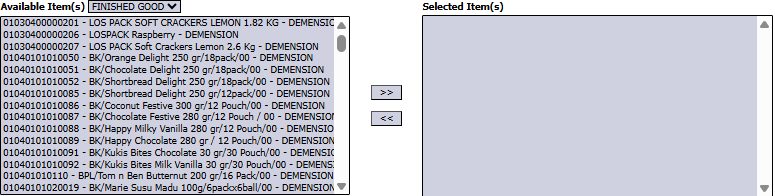
Step 3: Add Items and Fill in Prices
In the detail table at the bottom, use the Get Item button or search for a product in the or Type In Item Code column to add products to the table.
In each product row that is added, fill in the following columns:
Price: Enter the sales price that applies to this product within the price group being set up.
Min Qty: You can also specify a minimum purchase quantity for this price to be applicable.
Step 4: Save the Prices
After all prices for all products have been filled in, use the buttons in the bottom-left section:
Save: To save the price list as a draft.
Confirm: To finalize and activate this price list.
Cancel: To cancel the entry.
Workflow & Integrated Business Process
First: Create the price group framework in the Sales Price Group Settings module.
Second: Use this module (Sales Price Group Entry) to fill in the specific prices.
Result: The price list activated here will be automatically used by the system when creating a Sales Order for customers who belong to the corresponding category.
Tips & Important Notes
You must create the price group framework first in the "Sales Price Group Settings" module before you can fill in the prices in this module.
Ensure the prices input in the Price column are correct and in line with company policy before pressing Confirm.


No comments to display
No comments to display