The Complaint Management module functions as a centralized system to record, track, manage, and resolve every complaint received from customers. Using this module helps the company handle issues systematically, improve customer satisfaction, and identify frequently recurring problems with products or services.
1. Main View (Complaint List)
The main page of this module displays a list of all customer complaints that have been recorded in the system.
View Explanation
This page serves as a dashboard to monitor all incoming complaints.
Filters: You can search for a specific complaint by Document Number, a Date range, Category, or most importantly, by Status (Solved / Not Solved).
Complaint List: The table below displays a summary of each complaint, with columns such as Document Number, Requester, Complaint Date, Customer Name, and Category.
Button Functions
New: The primary button to record a new complaint received from a customer.
2. Steps to Manage a Complaint
The following is the complete workflow from recording to resolving a customer complaint.
Step 1: Record a New Complaint
From the Main View, click the New button to open the Add Complaint Management form.
Step 2: Fill in Complaint Details
Fill in all the relevant information on the form that appears. Fields marked with (*) are mandatory.
Complaint Date & Customer: Select the date the complaint was received and the name of the complaining customer from the dropdown.
Category: Choose the most appropriate complaint category (e.g., Product Quality, Delivery Delay, etc.).
Attachment / Reference Documents: Attach supporting files (photos, emails) or link to other documents in the system (such as an invoice number or delivery order).
Item Complained: If the complaint is related to a specific product, click the [+] icon and add the product details in this section, such as Item Code and Qty.
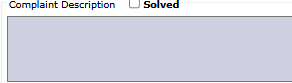
Complaint Description: Write down the details of the customer's complaint clearly and completely in the description field.
Step 3: Save the Complaint
Click the Save button to record the new complaint into the system. Its status will automatically be set to 'Not Solved'.
Step 4: Update Resolution Status
After the complaint has been successfully handled and a solution has been provided to the customer, reopen the complaint entry, add notes regarding its resolution, and check the Solved box.
Tips & Important Notes
Use the Status filter on the main page to quickly see all complaints that are still open (Not Solved) and require immediate follow-up.
Always attach relevant supporting evidence using the Attachment or Reference Documents features to strengthen the record and facilitate investigation.
This module is an important tool for the Customer Service, Sales, and Quality Assurance teams to monitor and improve the quality of services and products.


No comments to display
No comments to display