The Debit Notes module within Accounts Receivable is used to create and manage Debit Note documents issued to customers. A Debit Note is a formal document that serves to increase the amount of a receivable or a bill to a customer. It is typically used to correct an invoice that was under-billed or to add other charges that were not included in the original invoice.
1. Main View (Debit Note List)
The main page of this module displays a list of all Debit Notes that have been issued.
View Explanation & Filters
This page is the center for managing all existing Debit Notes.
Filters: You can search for a specific Debit Note by its document number (No.) or a date range (Date from / Date to).
Debit Note List: The table below will display all documents that match the filters. Its columns include Document Number, Account Name (Customer Name), Total Amount, Status, and Approval. The table currently shows "...No Record Found...".
Button Functions
New: The primary button to create a new Debit Note.
Print: To print a selected Debit Note to be sent to the customer.
Void: To cancel a Debit Note that has already been issued (for example, due to an error).
Edit Credit Notes: This button is likely misnamed in the system and should function as "Edit Debit Notes" or be used to modify an existing Debit Note draft.
2. Steps to Create a Debit Note
The following is the complete workflow for creating a new Debit Note.
Step 1: Create a New Debit Note
From the Main View, click the New button to open the New Debit Notes form.
Step 2: Fill in Debit Note Details
Fill in all the relevant information on the form that appears.
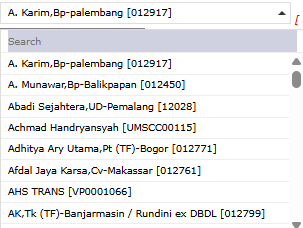
Customer: Select the customer to whom the Debit Note will be sent from the dropdown.
Date: Enter the document date; it will default to today's date (August 1, 2025).
Document Type: Select the appropriate document type.
Memo: Provide a clear explanation for the reason the debit note is being issued (e.g., "Correction for under-billing on invoice XXX").
Billing Details: You will then enter the billing details and amount in the detail section (not fully shown), including the Amount value and tax information if any.
Step 3: Save and Confirm
After all data is filled in, use the buttons in the bottom-left section:
Save: To save the Debit Note as a draft.
Confirm: To finalize and send the document to an approval workflow (if any).
Cancel: To cancel the entry.
Step 4: Print and Send
After the Debit Note is saved or confirmed, return to the main page. Select the newly created Debit Note from the list, then click Print to print it and send it to the customer.
Tips & Important Notes
Debit Notes are used to increase a customer's receivable amount. To decrease a receivable (for example, due to a return), use the Credit Note module.
Ensure you always provide a clear description in the Memo so the customer understands the reason for the additional charge.
The Void button is used to cancel an incorrectly issued Debit Note. A voided document will not be deleted from the system but will be marked as "canceled".


No comments to display
No comments to display