Purchasing > Price Settings > Event Pricing and Discount (Note: The title in the system indicates this module is related to Inventory | Event Pricing and Discount)
Module Objective
The Event Pricing and Discount module is used to create and manage special pricing or discount schemes that are valid for a limited time period, such as during promotional events, exhibitions, or clearance sales. This module allows you to define an "event", set its duration, and select which customers and products are included in the promotion.
1. Main View (Event List)
The main page of this module displays a list of all price promotion events that have been created.
View Explanation
This page is for viewing and managing all existing price promotion events.
Filter: You can search for a specific event using the search bar based on Event Name or a date range (Date From / Date To).
Event List: The table below will display a summary of each event, with columns for Event Name, Event Description, Event Start, and Event End.
Button Functions
New Event: The primary button to create a new price promotion event.
Delete: To delete a selected event.
2. Steps to Create a New Price Promotion Event
Step 1: Create a New Event
From the Main View, click the New Event button to open the event creation form.
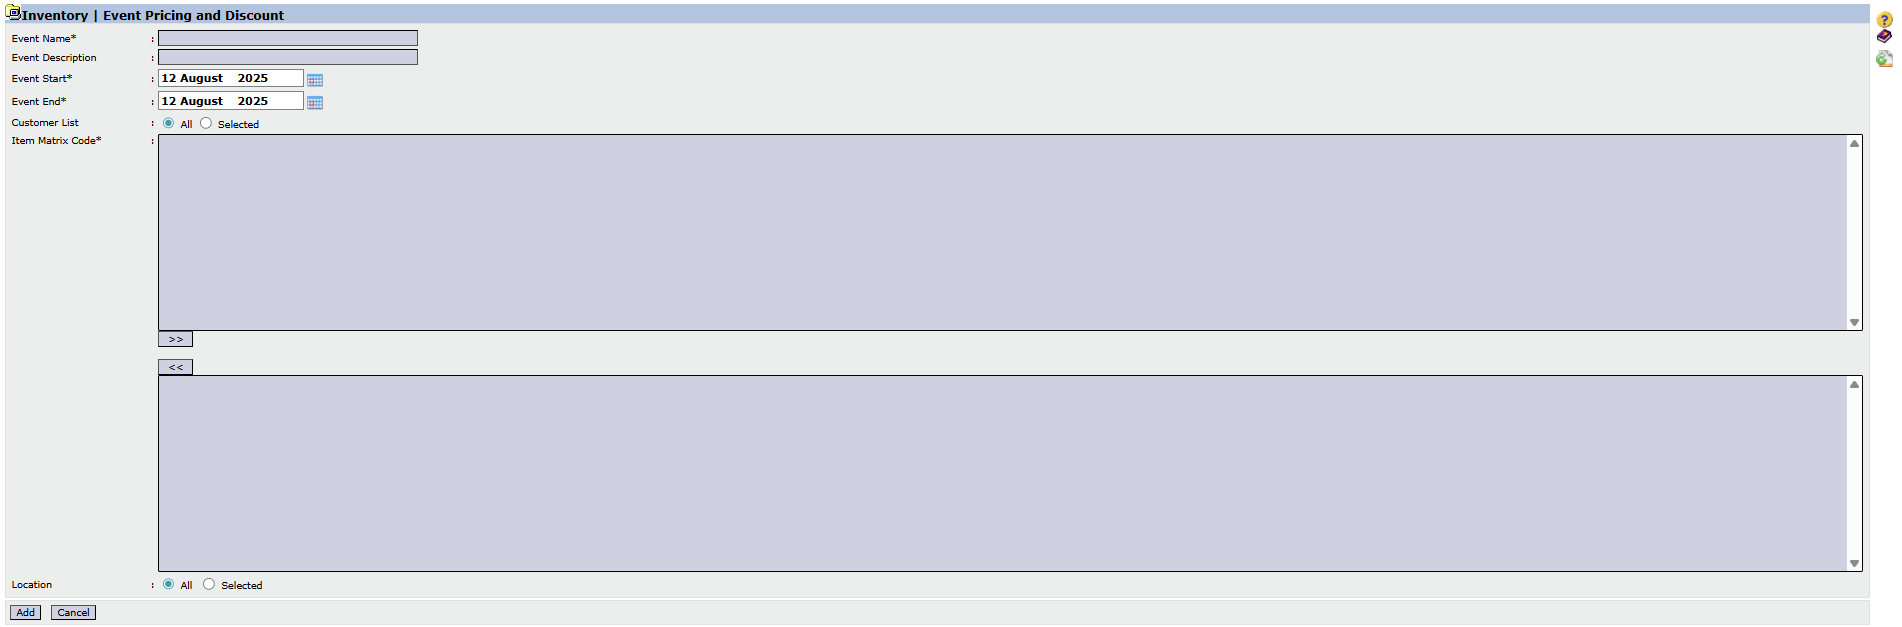
Step 2: Fill in Event Details
On the form that appears, fill in the general details about your promotional event:
Event Name & Event Description: Provide a clear name and description for the event.
Event Start & Event End: Define the start and end dates of the promotional event period.
Step 3: Define the Event Scope
Customer List: Define the event's target by selecting the customer scope, whether All or Selected (specific customers).
Item: Use the dual-list box to select all the product items that will be included in this promo program.
Location: Define the location or warehouse where this promotion is valid.
Step 4: Save the Event Framework
Click the Add button to save this promotional event framework.
Next Step: Filling in the Promo Prices
After the event framework is created, the next step is to fill in the specific promo prices or discounts for each selected item. This process is usually done by clicking on the newly created event from the Main View to open a price entry form.
Tips & Important Notes
This module is very useful for managing special prices during limited periods, such as trade shows, clearance sales, or holiday promos.
Ensure the Event Start and Event End dates are set correctly so that the promo price activates and deactivates automatically on the right dates.
The prices or discounts set here will override the regular prices during the event period for the specified customers and products.


No comments to display
No comments to display