The Sales Return module is used to record and manage the process of goods being returned by customers. The document created in this module becomes the basis for subsequent processes, namely the issuance of a Credit Note to reduce the customer's receivable and the readjustment of stock levels in the warehouse.
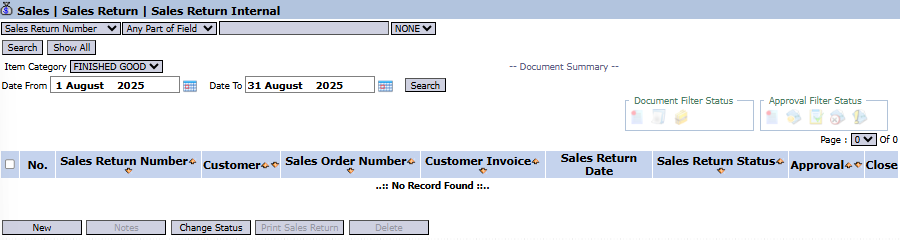
1. Main View (Sales Return List)
The main page of this module displays a list of all Sales Return documents that have been created.
View Explanation & Filters
This page is for viewing and managing all return transactions.
Filters: You can search for a specific return by Sales Return Number, Item Category, or a date range (Date From / Date To).
Return List: The table below will display all returns that match the filters, with columns such as Sales Return Number, Customer, Customer Invoice (Customer Invoice Number), and Sales Return Status.
Button Functions
New: The primary button to create a new Sales Return record.
Change Status: To change the status of a selected return document.
Print Sales Return: To print the details of a selected return document.
Delete: To delete a return document.
2. Steps to Record a Sales Return
Step 1: Create a New Return Record
From the Main View, click the New button to open the Add Sales Return form.
Step 2: Fill in Header Information
On the form that appears, fill in the general information about the return:
Sales Return Date: Enter the date the returned goods were received.
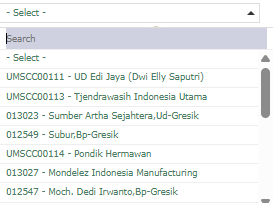
Customer: Select the customer who is making the return.
INVOICE Number: Important! Select the original sales invoice number related to the returned goods. This will be the basis for determining the price and validating the return.
Notes: Provide a note regarding the reason for the return (e.g., damaged goods, wrong shipment, etc.).
Step 3: Detail the Returned Items
In the detail table at the bottom:
Click the [+] Multiple Item [-] link to add or remove rows.
Enter the Item (Item Code) and Qty (Quantity) that were returned by the customer.
The system will pull the price (Price Per Unit) from the original transaction and calculate the Total Return.
Step 4: Save and Confirm
Click the Calculate button to ensure all totals have been calculated correctly.
Use the buttons in the bottom-left section to finish:
Save: To save the return document as a draft.
Confirm: To finalize the return document and send it into the approval workflow.
Cancel: To cancel the entry.
Workflow & Integrated Business Process
A Sales Return document that has been Confirmed and approved is the primary basis for creating a Credit Note in the Accounts Receivable Module to reduce the customer's bill.
This return process will also trigger the process of adding sellable returned goods back into the warehouse inventory.
Tips & Important Notes
Always link a return with the original INVOICE Number to ensure accurate history tracking and calculation of the credit value.
Use the Notes column to record the reason for the goods return as material for evaluating product quality or delivery services.


No comments to display
No comments to display