The Purchase Order (PO) module is the center of the procurement process. Its purpose is to create an official purchase order document that is sent to a supplier (vendor) to order goods or services. An approved PO is a legally binding document and serves as an authorization for the vendor to ship the goods, as well as the basis for the warehouse's goods receipt process.
1. Main View (Purchase Order List)
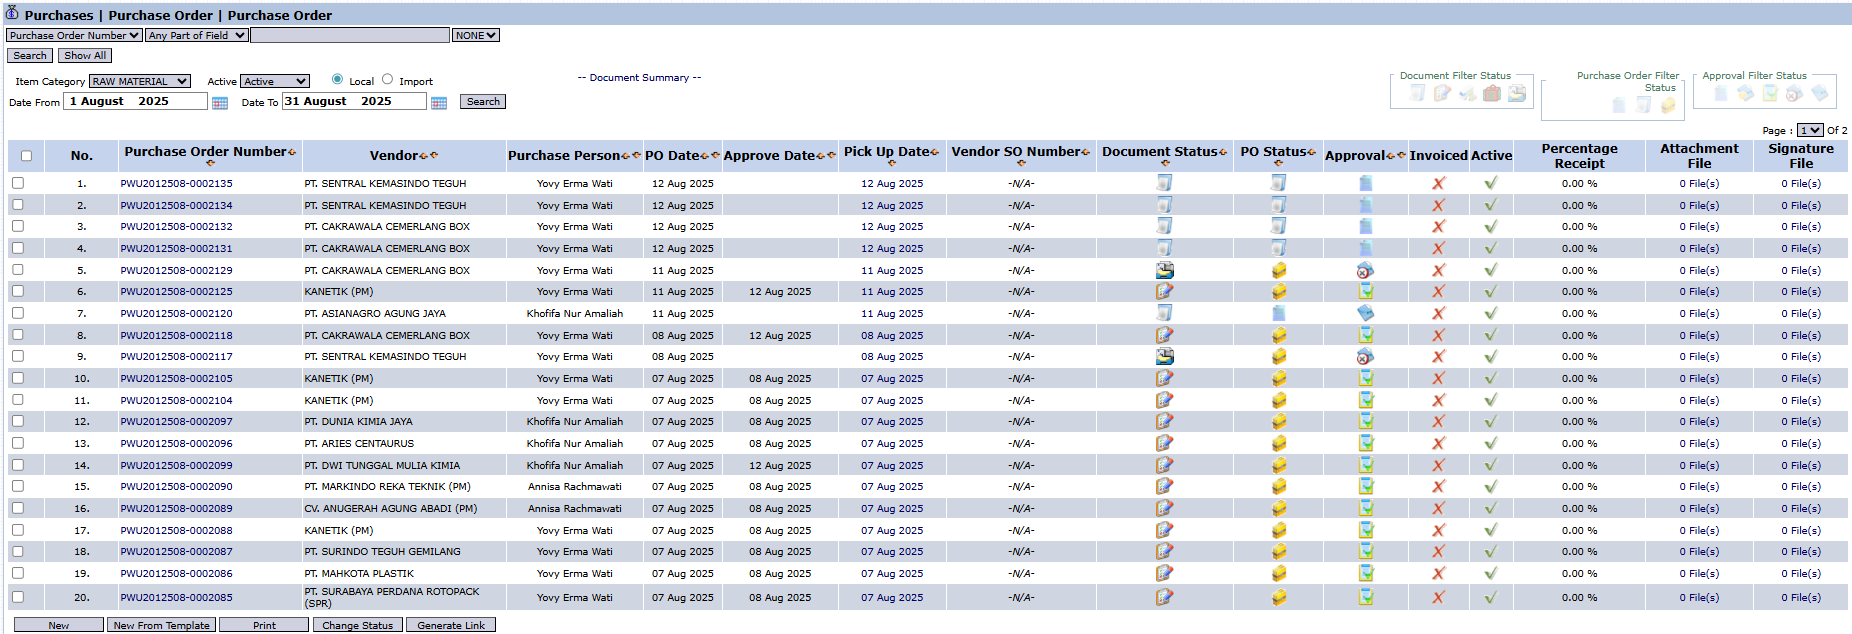
The main page of this module displays a list of all Purchase Orders (POs) that have been created.
View Explanation & Filters
This page is for viewing and managing all POs.
Filters: You can search for a specific PO by Purchase Order Number, Item Category, Active status, or a date range.
PO List: The table below will display all POs that match the filters, with columns such as Purchase Order Number, Vendor, PO Dates, PO Status, Approval, and Invoiced (Invoice Status).
Button Functions
New: To create a new PO, usually from a Purchase Requisition or Vendor Quotation.
New From Template: To create a new PO based on a saved draft/template.
Print: To print the details of a selected PO.
Change Status: To change the status of a selected PO.
2. Steps to Create a Purchase Order
Step 1: Create a New PO
From the Main View, click the New or New From Template button to open the PO creation form.
Step 2: Select the Source Document (Best Practice)
On the form that appears, the best way to maintain workflow integrity is to pull data from an existing document:
Select a Document Source (for example, Vendor Quotation to pull the agreed-upon price).
Alternatively, click the Purchase Requisition | Pick button to select items from one or more approved Purchase Requisitions (PRs).
Step 3: Fill in Header Information
Select the Vendor (if not auto-filled) and verify all details such as the PO Date and Payment Term.
Step 4: Detail the Order Items
In the detail table in the middle section, ensure all Item Code, Qty (Quantity), and Unit Price are correct according to the quotation or requisition. You can also add additional costs in the Add Miscellaneous Charge section.
Step 5: Save and Confirm
After all data is filled in, use the buttons at the bottom:
Save: To save the PO as a draft.
Confirm: To finalize the PO and send it into the approval workflow.
Cancel: To cancel the entry.
Workflow & Integrated Business Process
A PO that has been Confirmed will go to the Purchase Order Inbox to be approved by a manager.
An approved PO is the authorization for the vendor to ship goods and becomes the basis for the Warehouse department for the Goods Receipt process.
Tips & Important Notes
Always try to create a PO from a Purchase Requisition or Vendor Quotation to ensure the purchase aligns with internal requests and approved prices.
Use the New From Template button on the main page to quickly create routine POs.


No comments to display
No comments to display