Manage Warranty
Module Guide: Manage Warranty
Module Location
CRM > Manage Warranty
Module Objective
The Manage Warranty module functions as the data center for viewing, searching for, and managing all product warranty information for items that have been sold to customers. This module is used by the customer service team to verify the warranty status of a product when a customer submits a claim or service request.
1. Main View (Warranty List)
The main page of this module displays a list of all product warranty records that exist in the system.

View Explanation
This page is the database for all active and expired warranties.
-
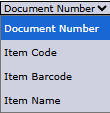
Filter: You can search for a specific warranty record using the search bar based on Document Number or other details.
-
Warranty List: The table below displays all warranty records that match the filters. The table currently shows "...No Record...".
Column Explanation
-
Document Number: The reference document number, most likely the sales invoice number that is the basis for the warranty creation.
-
Item Code / Item Name: The code and name of the product that has a warranty.
-
Warranty Start Date: The start date of the warranty period, usually the same as the sales/invoice date.
-
Warranty End Date: The expiration date of the warranty period.
Button Functions
2. Warranty Management Workflow
1. Warranty Data Creation (Automatic)
Warranty data is generally not created manually in this module. A warranty record is created automatically by the system when a product that has a warranty period is sold and its Sales Invoice is issued. The invoice date will become the Warranty Start Date.
2. Searching for Warranty Data
To check the warranty status of a customer's product:
-
Open the Manage Warranty module.
-
Use the search bar to find the data by Document Number (invoice number), Item Code, or Item Name.
-
Click Search. The system will display the warranty details, including its expiration date.

3. Updating Warranty Data
If there is a need to change the data (for example, due to a warranty extension program):
-
Search for and find the warranty record to be changed.
-
Select that record by checking the box in the leftmost column.
-
Click the Update button to open the editing form and make the changes.

Tips & Important Notes
-
This module is the primary source of information for the Customer Service team to validate warranty claims from customers quickly and accurately.
-
Ensure the product master data has been set up with the correct warranty period so that the records automatically created by the system are valid.
-
The Warranty End Date column is the key piece of information for determining whether a customer's product is still under warranty or not.
No comments to display
No comments to display