Direct Selling > Direct Selling Return > Direct Selling Return
Module Objective
The Direct Selling Sales Return module is used to record and manage the process of goods returns that originate from the direct selling channel. The document created here becomes the basis for the process of adjusting the inventory stock that returns from the field and for issuing related financial documents (such as a Credit Note).
1. Main View (Return List)
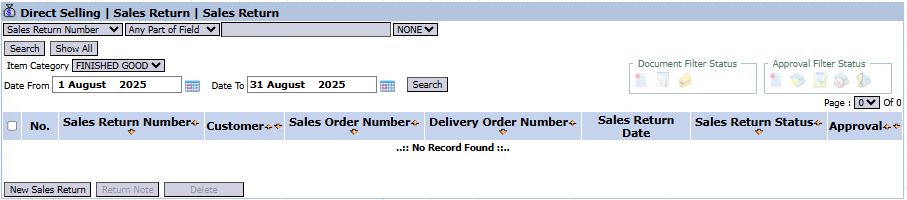
The main page of this module displays a list of all Direct Selling Sales Return documents that have been created.
View Explanation & Filters
This page is for viewing and managing all return transactions from direct sales.
Filters: You can search for a specific return by Sales Return Number, Item Category, or a date range (Date From / Date To).
Return List: The table below will display all returns that match the filters, with columns such as Sales Return Number, Customer, Sales Order Number, and Sales Return Status.
Button Functions
New Sales Return: The primary button to create a new Direct Selling Sales Return record.
Return Note: Likely for printing a return note.
Delete: To delete a return document.
2. Steps to Record a Direct Selling Sales Return
Step 1: Create a New Return Record
From the Main View, click the New Sales Return button to open the Add Sales Return form.
Step 2: Fill in Header Information
On the form that appears, fill in the general information about the return:
Sales Return Date: Enter the date the returned goods were received.
Customer: Select the customer who is making the return.
Shipment Note Number: Important! Select the original Delivery Order (Shipment Note) number from the direct selling transaction being returned. This will be the basis for validating the return.
Warehouse: Specify the destination warehouse where the returned goods will be received.
Step 3: Detail the Returned Items
In the detail table at the bottom, list the products that were returned:
Enter the Item (Item Code) and Qty (Quantity) returned by the customer.
Select a Select Bin location in the warehouse if required.
Step 4: Save and Confirm
After all data is filled in, use the buttons in the bottom-left section:
Save: To save the return document as a draft.
Confirm: To finalize the return document and send it into the approval workflow.
Cancel: To cancel the entry.
Workflow & Integrated Business Process
A Direct Selling Sales Return document that has been Confirmed will go to the Direct Selling Sales Return Inbox to be approved.
After approval, this return becomes the basis for a stock adjustment and the creation of a Credit Note, if needed, to reduce the customer's bill.
Tips & Important Notes
Always link a return with the original Shipment Note Number to ensure accurate history tracking.
Use the Notes column to record the condition of the returned goods or the reason for the return as material for evaluation.


No comments to display
No comments to display