The Journal Verification module serves as a checkpoint or internal control point in the accounting process. Its purpose is to conduct a formal review and validation of transactions or journals that have been input by other users. This verification process ensures that every journal is accurate, valid, and compliant with company policy before being considered final.
1. Main View (List of Journals to be Verified)
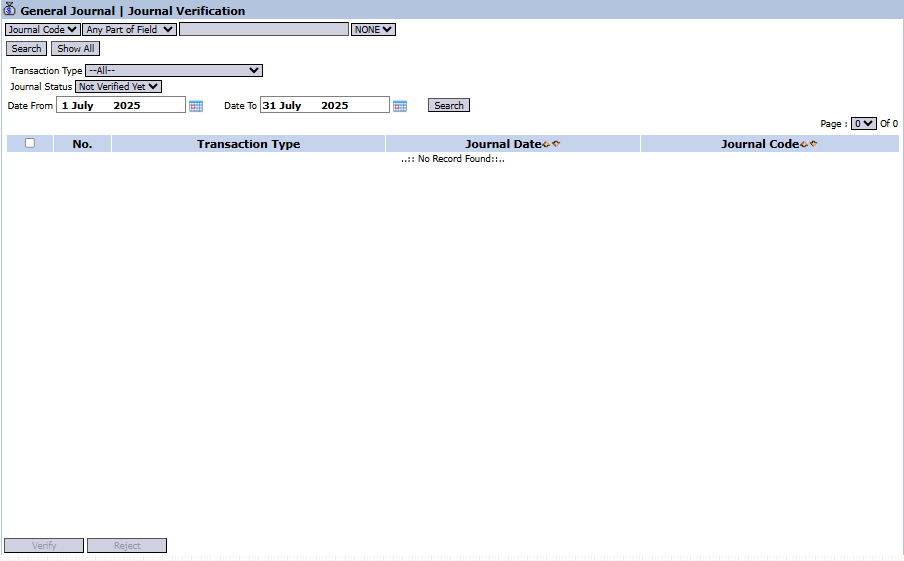
The main page of this module displays a list of all journals from various transaction types that are awaiting verification.
View Explanation
This page is the work hub for users who have the authority to perform verification.
Filters: You can search for specific journals using several very useful filters:
Journal Code: To search by a specific journal number.
Transaction Type: To filter by the type of transaction (e.g., General Journal, Purchase Invoice, etc.).
Journal Status: The most important filter in this module. You can choose to display journals that are "Not Verified Yet", "Verified", or all.
Date From and Date To: To filter by a date range.
Journal List: The table below will display all journals that match the filter criteria. Currently, the table shows "...No Record Found...".
Column Explanation
Transaction Type: The transaction type of the displayed journal.
Journal Date: The date the journal was created.
Journal Code: The unique number of the journal to be verified.
Button Functions
Verify: The main action button to give a "Verified" status to one or more selected journals.
Reject: The button to reject a selected journal, typically if an error or discrepancy is found.
2. Journal Verification Process Steps
The following is the standard workflow for a verifier.
Step 1: Filter Journals to be Verified
To see your to-do list, use the Journal Status filter and select "Not Verified Yet". Then, click Search. The system will display all journals awaiting your action.
Step 2: Review Transaction Details
Before providing verification, you must check the details of each journal. This can be done by clicking on the journal row or by looking up the Journal Code in its original module (e.g., searching in the General Journal module) to see the debit-credit details and its supporting documents.
Step 3: Provide Verification or Rejection
After you are certain of the journal's correctness:
Check the box on the left of one or more journal rows to be processed.
Click the Verify button in the bottom-left section to approve and apply the "Verified" status.
If you find an error, click the Reject button to reject the journal. A rejected journal will typically be returned to its creator for correction.
Tips & Important Notes
This module is a critical part of the internal control process to ensure financial data integrity.
The Journal Status filter is your primary tool in this module. Use "Not Verified Yet" to see the work that needs to be done.
Before clicking Verify, ensure you have checked the correctness of the source documents, authorization, and the related journal entries.
This module is generally used by senior Accounting teams, Internal Audit, or managers responsible for data validation.


No comments to display
No comments to display