The Sales Contract module is used to create, manage, and track long-term sales agreement documents with customers. Unlike single transactions, this contract defines the agreed-upon terms, products, and prices that will apply to all sales orders during the contract period.
1. Main View (Contract List)
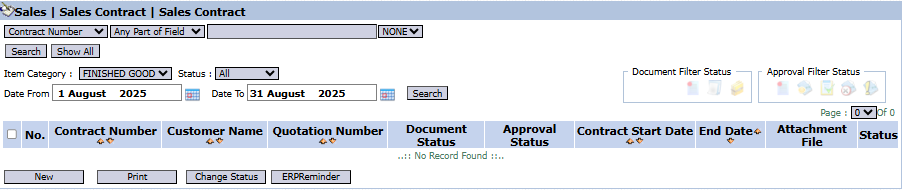
The main page of this module displays a list of all Sales Contract documents that have been created.
View Explanation & Filters
This page is for viewing and managing all existing sales contracts.
Filters: You can search for a specific contract by Contract Number, Item Category, Status, or a date range (Date From / Date To).
Contract List: The table below will display all contracts that match the filters, with columns such as Contract Number, Customer Name, Contract Start Date, End Date, and Approval Status.
Button Functions
New: The primary button to create a new Sales Contract.
Print: To print the details of a selected contract.
Change Status: To change the status of a selected contract.
FBill Reminder: Likely functions to send a billing reminder related to the contract.
2. Steps to Create a Sales Contract
Step 1: Create a New Contract
From the Main View, click the New button to open the Add Sales Contract form.
Step 2: Fill in Contract Header Information
On the form that appears, fill in the general information and terms of the contract:
Basic Information: Select the Customer, and fill in important dates such as Sales Contract Date, Contract Start Date, and End Date.
Reference: You can link it to an existing quotation by selecting the Quotation Number.
Important Terms: Fill in key terms such as Maximum Sales Amount and the details in Terms and Condition.
Step 3: Detail the Contract Items and Prices
In the detail table at the bottom, list all the products included in the contract:
Fill in the Item Code and Qty (Quantity) as agreed.
Fill in the Unit Price and Discount (%) that have been agreed upon and will remain fixed for the duration of the contract.
Step 4: Save and Confirm
After all data is filled in, use the buttons in the bottom-left section:
Save: To save the contract as a draft.
Confirm: To finalize and send the contract into the approval workflow.
Cancel: To cancel the entry.
Tips & Important Notes
An active Sales Contract will become the reference for prices and terms for Sales Orders created for that customer during the contract period.
Use the Maximum Sales Amount field to control that the total sales under this contract do not exceed the agreed-upon value.
A document that has been Confirmed will likely go to a Sales Contract Inbox for an approval process by management.


No comments to display
No comments to display