Sales > Sales Trade Agreement > Sales Price Group Settings
Module Objective
The Sales Price Group Setting module is used to create and manage various pricing schemes or price lists. This setup allows the company to apply different pricing structures that can be targeted at specific customer categories and for specific products. It is a core component of the company's pricing strategy.
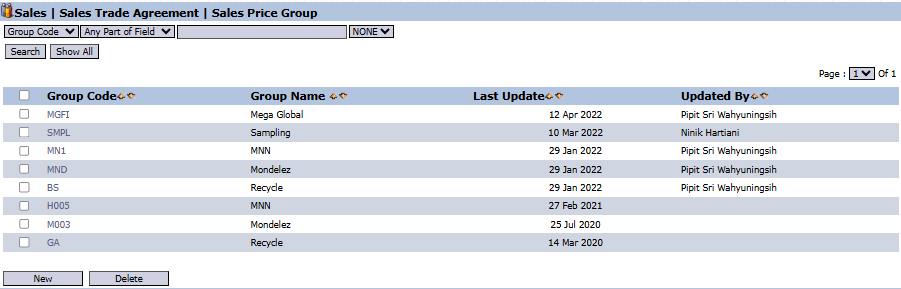
1. Main View (Price Group List)
The main page of this module displays a list of all Price Groups that have been created.
View Explanation
This page is for viewing and managing all existing pricing schemes.
Filter: You can search for a specific price group using the search bar based on the Group Code.
Group List: The table below displays a summary of each existing price group, with columns for Group Code, Group Name,- Last Update, and Updated By.
Button Functions
New: The primary button to create a new Price Group.
Delete: To delete a selected price group.
2. Steps to Create a New Price Group
Step 1: Create a New Price Group
From the Main View, click the New button to open the Add Sales Price Group form.
Step 2: Fill in Basic Information
Fill in the general information about the price group to be created:
Group Code & Group Name: Provide a unique code and a clear name for your price group (e.g., "PRICE-DISTRIBUTOR-EASTJAVA").
Period: Define the start and end dates for the validity period of this pricing scheme.
Currency & Payment Terms: Select the applicable currency and payment terms.
Step 3: Define Target Customers
In the Customer Category section, select which customer categories will receive this pricing scheme. Move the relevant categories from the left box to the Selected Category box on the right using the >> button.
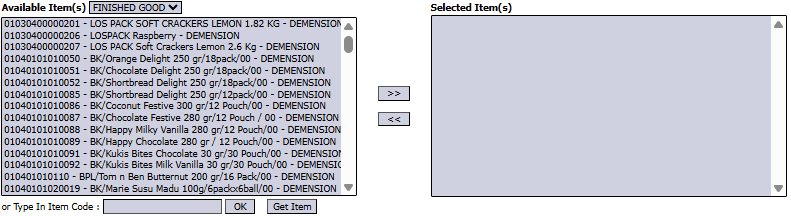
Step 4: Define Applicable Products
In the Available Item(s) section, select which products are included in this pricing scheme. Move the relevant products from the left box to the Selected Item(s) box on the right using the >> button.
Step 5: Save the Price Group
After all settings are complete, click the Save button in the bottom-left section to create the price group framework.
Next Step: Filling in the Prices
After a price group is successfully created, the next step is to fill in the price for each product within it. This process is usually done by clicking on the newly created price group from the Main View to open a specific price entry form.
Tips & Important Notes
This module allows you to have different pricing strategies for different market segments (for example, the price for Modern Trade can be different from the price for General Trade).
Ensure the Period is filled in correctly to control the validity period of each pricing scheme.
The price groups created here will later become options in the customer master data or when creating a sales transaction to determine the price that will be used.


No comments to display
No comments to display