Vendor Quotation
Module Guide: Vendor Quotation
Module Location
Purchasing > Purchase RFQ > Vendor Quotation
Module Objective
The Vendor Quotation module is used to record, compare, and select price offers received from suppliers (vendors). This module is the follow-up to the Purchase RFQ, where the purchasing team inputs all incoming offers to then select the best offer, which will be used as the reference for creating a Purchase Order.
1. Main View (Item List)
The main page of this module displays a list of items that are in the process of having price quotations collected.
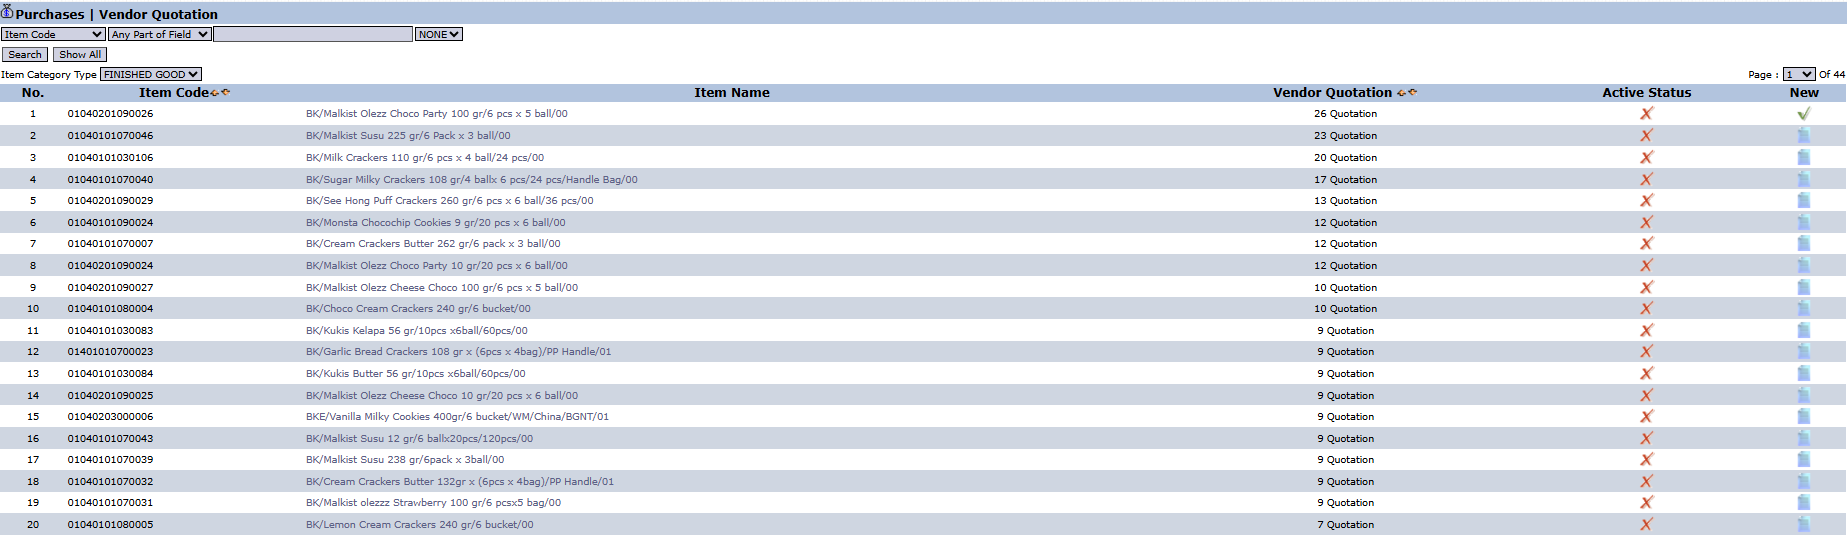
View Explanation: This page groups the quotations by Item Code. The Vendor Quotation column shows how many offers have been received for each item.
Navigation: To see the detailed comparison of offers for an item, click on that item's row.
2. Steps to Manage Vendor Quotations
Step 1: Access the Comparison Page
From the Main View, click on the Item Name for which you want to manage the quotations. You will be directed to a detail page that displays all the quotations that have been received for that item.
Step 2: Add a New Quotation
-
On the detail page, click the New button to open the Add Vendor Quotation form.

-
On the form that appears, fill in all the details of the quotation received from the vendor:
-
Quotation Number: The quotation number from the vendor.

-
Start Date & End Date: The validity period of the offered price.

-
Purchase Requisition Code & RFQ: Link to the initial Purchase Requisition and RFQ documents.

-
Vendor: Select the vendor providing the offer.

-
Unit Price: Important! Enter the unit price offered by the vendor.

-
File Upload: Upload the original quotation document from the vendor.

-
-
Click Save to save the quotation data.

Step 3: Compare and Select the Quotation
After all quotations from various vendors have been input, you can compare them on the detail page. Pay attention to and compare the Unit Price column from each vendor.
Step 4: Activate the Selected Quotation
Select the best offer by checking the box to its left, then click the [Set Active] button. The offer that is set as "Active" (marked with a green checkmark in the Active Status column) will become the reference price for the creation of a Purchase Order. 
Workflow & Integrated Business Process
-
This module is the continuation of the Purchase RFQ.
-
The vendor quotation whose status has been set to Active will become the default price when the purchasing team creates a Purchase Order for that item and vendor.
Tips & Important Notes
-
Always upload the original quotation document from the vendor using the File Upload feature as proof and for audit purposes.
-
The Set Active action is very important as it will determine which vendor and price will be used in the subsequent purchase transaction.
No comments to display
No comments to display