APPLICATION
ATMI
Access Requisition Module Guide
Module Location:
Access Requisition > Requisition ATMI
The ATMI (Access to Information Media Transfer) request is used to create requests related to access to information media transfer through the Access Requisition system. This page allows you to create a new ATMI request, view the list of requests currently displayed in the system, and view the history of previously submitted ATMI requests.
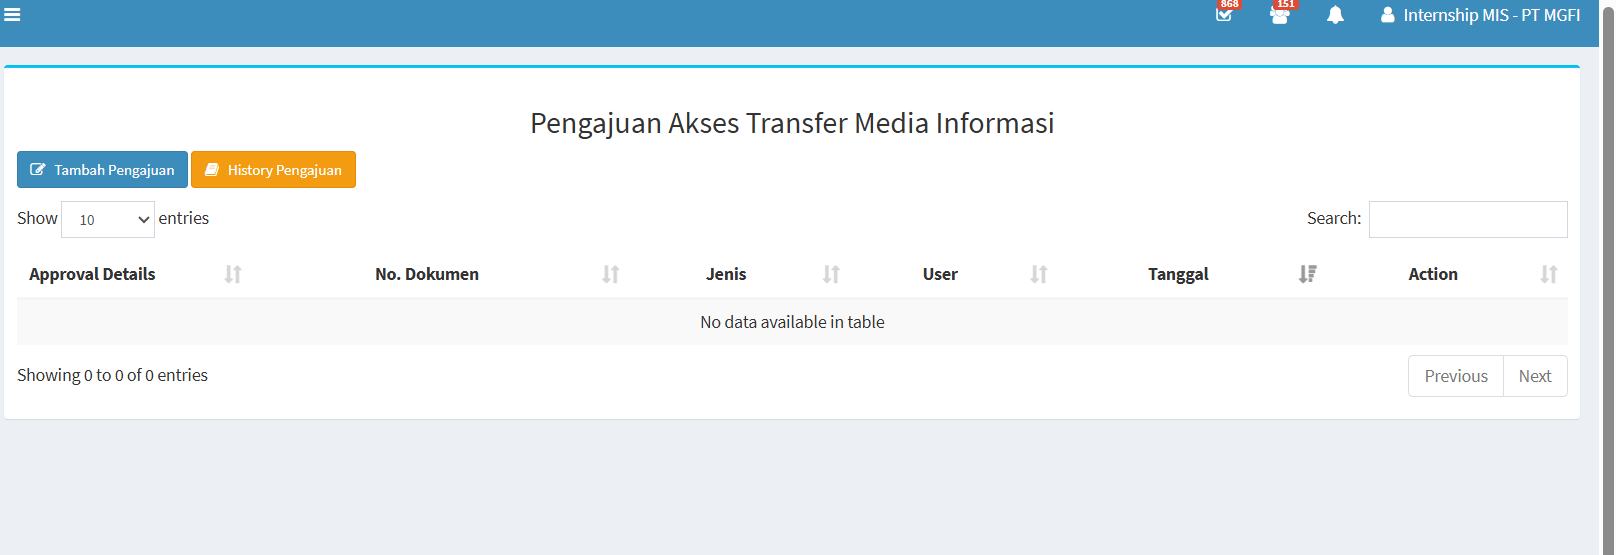
This page contains several main functions: Add Application, Application History, the application list table, the search feature, and settings for the number of records displayed.
|
Section |
Description |
|---|---|
|
Tambah Pengajuan |
Used to create a new ATMI application. |
|
Application History |
Used to view the history of previously submitted ATMI applications. |
|
Show Entries |
Used to specify the number of records displayed in the table. |
|
Search |
Used to search for specific data in the application list. |
|
Approval Details |
Displays information related to the application approval process or details. |
|
Dokumen No. |
Displays the ATMI application document number. |
|
Type |
Displays the type of application submitted. |
|
User |
Displays the user associated with the application. |
|
Date |
Displays the date the application was created or recorded in the system. |
|
Action |
Displays the actions available for the application data. |
|
Previous / Next |
Used to navigate to the previous or next page of data if there is more than one page of data. |
-
Add Request
To create a new ATMI request:
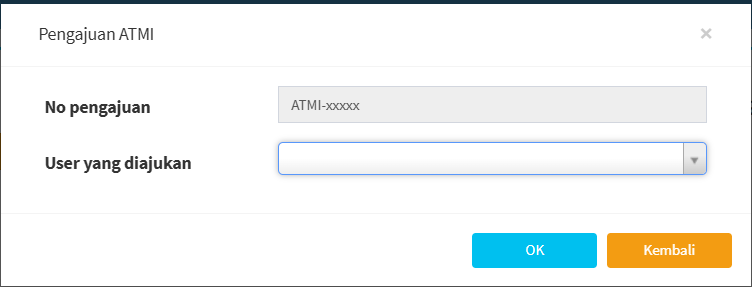
- First, click “Add Request.” Once you click the button, the ATMI request form will appear.

- On the ATMI request form, there is a “Request No.” field.
The application number is displayed in the following format:
ATMI-xxxxx - In the “User Being Applied For” field, click the available options and then select the user for whom you want to create the ATMI application.
- Make sure the selected user is correct before clicking the “OK” button.
-
Request History

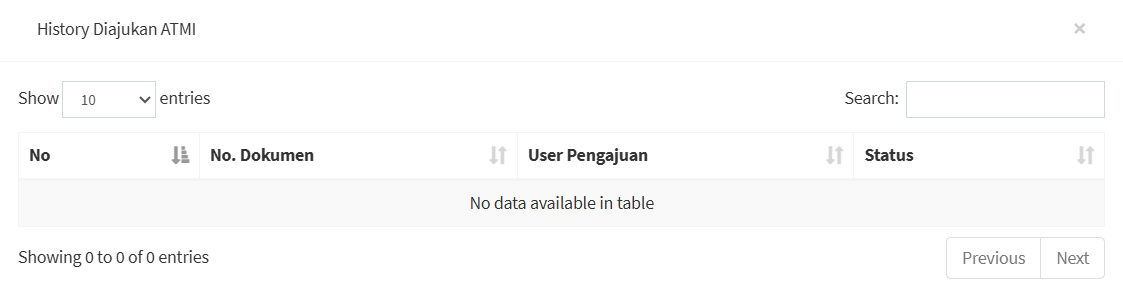
The Request History menu is used to view the history of ATMI requests. To view the request history, click the Request History button on the ATMI main page. The system will display the ATMI Request History page or pop-up.
APPLICATION ACCESS
Access Requisition Module Guide
Module Location:
Access Requisition > Requisition > Application Access
The Application Access Request feature is used to submit requests for access to applications available on the company’s system. Users can specify the applications for which access is requested and the users who require that access. Available applications are grouped by type such as ERP and non-ERP so users can select applications based on their needs.
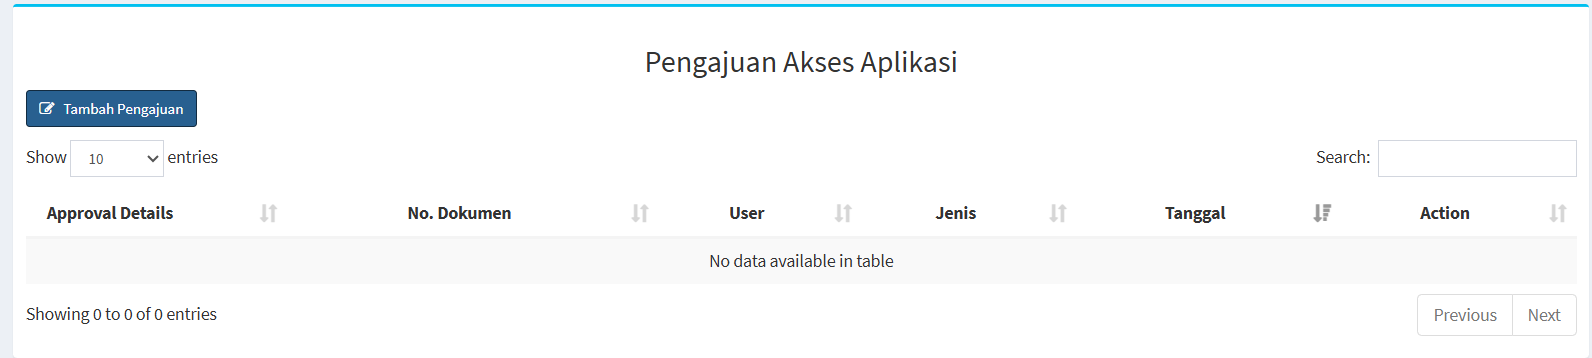
The main page features an “Add Request” button, a table listing requests, a search feature, and settings to adjust the number of records displayed.
-
Column Descriptions:
Section Description Add Request
Used to create a new application access request.
Show Entries Used to set the number of records displayed in the table.
Search Used to search for specific request data.
Approval Details Displays information regarding the approval process or details of the request.
Dokumen No. Displays the document number of the application access request.
User Displays the user associated with the application access request. Type Displays the type of application requested. Date Displays the date the request was created or recorded in the system. Action Displays the actions that can be performed on the request data. Previous / Next Used to navigate to the previous or next page of data. -
Application Access Requests
Here are the steps to submit an application access request:
-
First, click the “Add Request” button. Once clicked, the application access request form will appear.

-
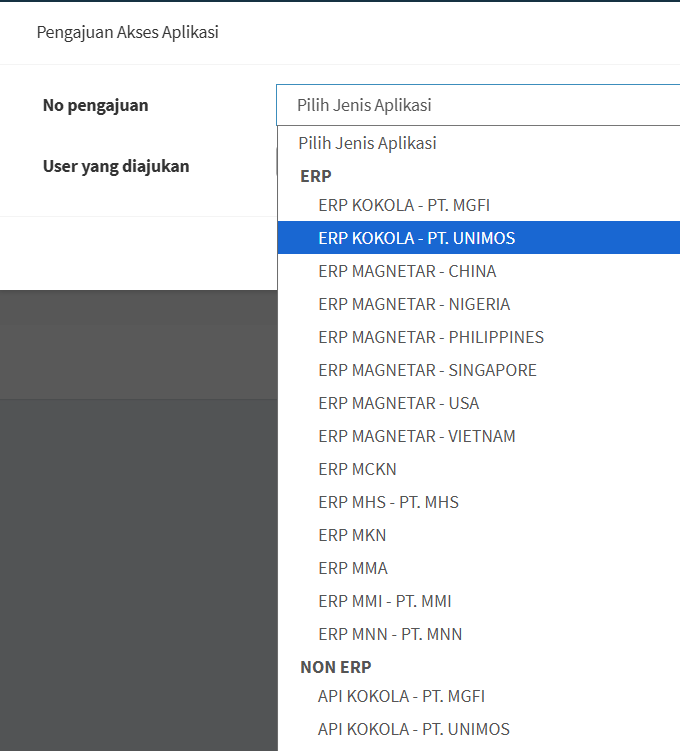
On the request form, open the “Application Type” dropdown menu. The system will display a list of available applications, grouped by application category. This view contains two main groups, namely:
Type
Description
ERP
Berisi pilihan aplikasi ERP yang tersedia pada beberapa perusahaan atau unit.
NON ERP
Berisi pilihan aplikasi selain ERP yang tersedia pada sistem.
-
In the “Requested User” field, select the user who needs access to the application. Make sure the user matches the request you are creating.
- Make sure all fields are filled out before clicking the “OK” button.
APPLICATION CHANGES
Access Requisition Module Guide
Module Location:
Access Requisition > Requisition > Application Change
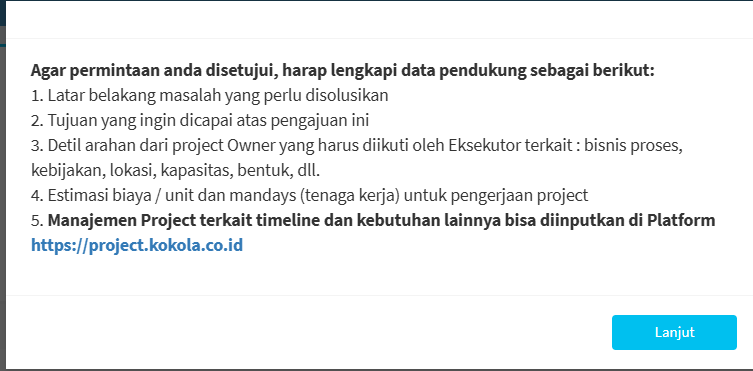
The Application Change Menu is used to submit requests related to application requirements, including requests for new applications or changes, based on the options available in the system. Before submitting a request, users must prepare supporting information that explains the requirements, objectives, project guidelines, and implementation needs so that the request can be understood and processed by the relevant parties.
-
Main View
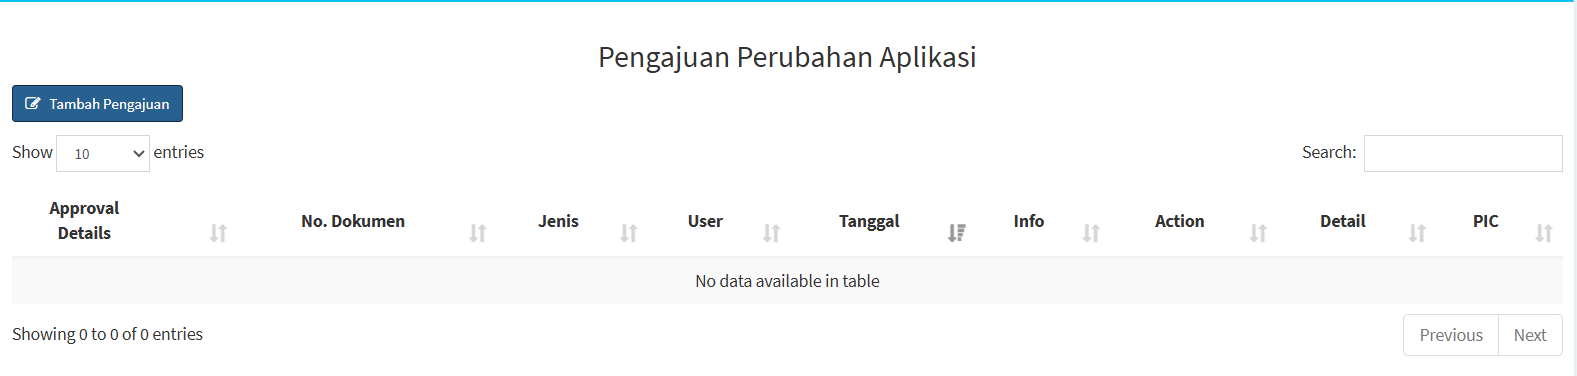
The Application Change Request page is used to view a list of requests that have been submitted and to create new requests. This page features an “Add Request” button, a table listing requests, a search feature, and settings to adjust the number of records displayed.
-
Screen Description
| Section | Description |
|---|---|
| Add Submission | Used to create a new Application Change submission. |
| Show Entries | Used to specify the number of records displayed in the table. |
| Search | Used to search for submissions based on specific keywords. |
| Approval Details | Displays information about the approval process or details of the submission. |
| Dokumen No. | Displays the submission document number. |
| Type | Displays the type of application or submission selected. |
| User | Displays the user associated with the application. |
| Date | Displays the date the application was created or recorded in the system. |
| Info | Displays information regarding the status of the application. |
| Action | Displays the actions that can be taken on the application. |
| Detail | Used to view detailed information about the application, if available. |
| PIC | Displays the PIC associated with the application process, if specified. |
-
Submitting an Application Change Request
To create a new request, click the button:
“Add Request”
Before proceeding to the application selection form, the system will display information regarding the supporting documents that need to be prepared.

-
Selecting an Application Request
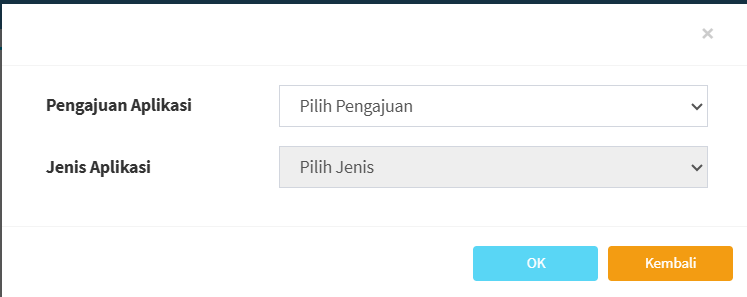
After the Next button is selected, the system displays the application form.

The form contains two main fields:
Field
Description
Application Submission
Used to specify the type of application submission to be made.
Application Type
Used to specify the application associated with the submission.
OK
Used to continue the process after a selection has been made.
Back
Used to go back or cancel the process at that stage.
X
Used to close the form.
-
Used to close the form.
In the Application Submission field, select the type of submission that best suits your needs. In the example screenshot, the option selected is:
“New”
This means that the submission being created is a new application submission, as per the options available in the system.
-
Selecting the Submission Type
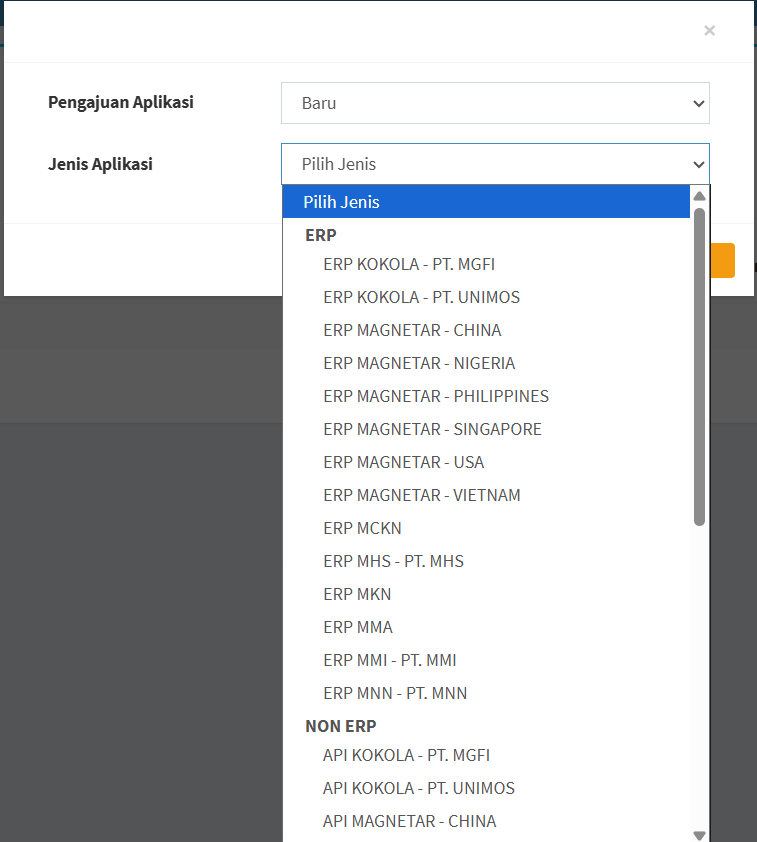
After selecting “Submit Application,” choose an application from the “Application Type” field. Applications in the system are grouped by category, such as:

- Selecting the Appropriate Application
-
Ensure that the selected application aligns with:
company → system/application → submission requirements
-
Pay attention to the company name in the application options, as the same application may be available for multiple companies or different units.
For example:
ERP KOKOLA - PT. MGFI
is different from:
ERP KOKOLA - PT. UNIMOS
even though both use ERP KOKOL
-
- Continuing the Submission Process
After selecting the Application Submission and Application Type, click the button:
“OK”
The system will proceed to the next step based on the selected application type and submission.
If the user does not wish to continue, click:
“Back”
WORKING PERMIT
Access Requisition Module Guide
Module Location:
Access Requisition > Requisition > Working Permit
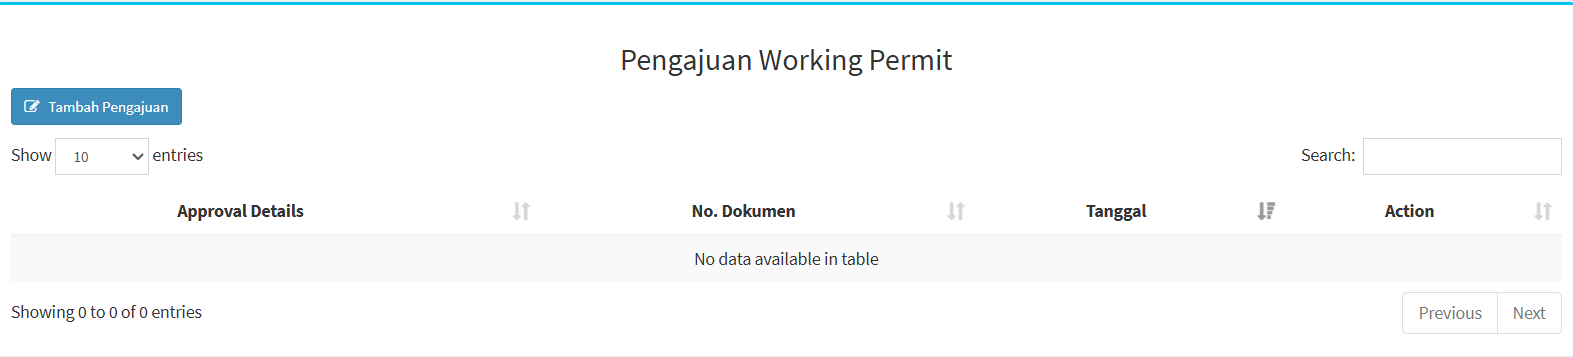
On the Working Permit Application page, you can view a list of Working Permit applications that have been created. The main page features an Add Application button, a table listing the applications, a search feature, and settings to adjust the number of records displayed.
| Section | Description |
|---|---|
|
Add Application |
Used to create a new Working Permit application. |
| Show Entries |
Used to set the number of records displayed in the table. |
| Search | Used to search for specific application data. |
| Approval Details | Displays information regarding the application approval process. |
| Dokumen No. | Displays the Working Permit document number. |
| Date | Displays the application date or the date recorded on the document. |
| Action | Displays the actions available for that application. |
| Previous / Next | Used to navigate between pages if there is more than one page of data. |
Some columns include sorting icons that can be used to sort the data. If there are no applications to display, the system will display the message “No data available in table.”
-
Working Permit Application


-
First, click the “Add Application” button. Once clicked, the work permit application form will appear.
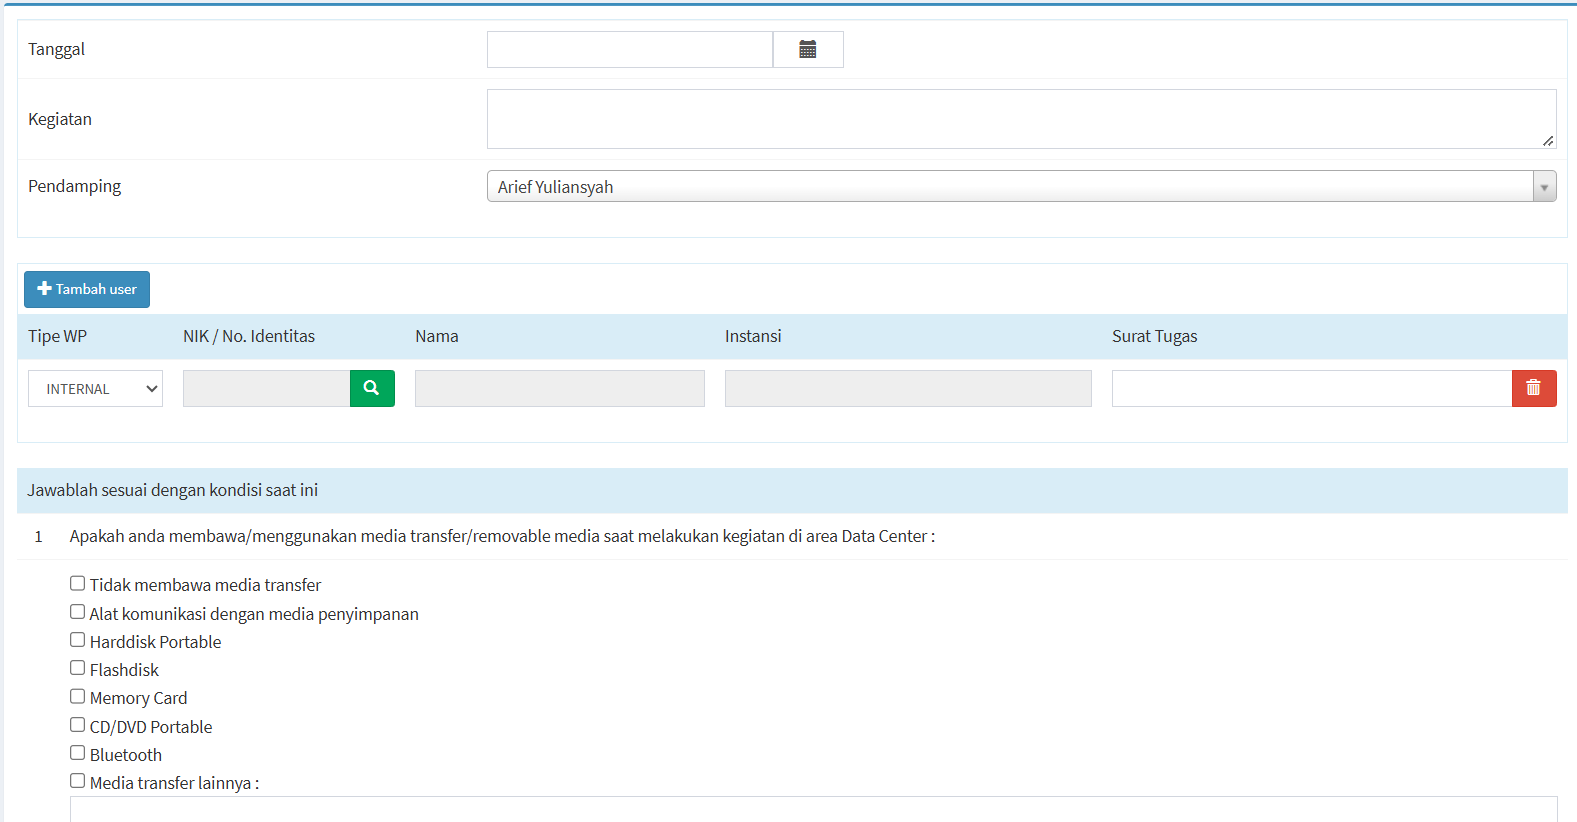
- After clicking the “Add Application” button, a form will appear that you must complete. At the beginning of the form, you must provide information regarding the activity to be carried out.
Field
Description
Date
Used to specify the date the activity will take place.
Activity
Used to describe the activity or work to be performed in the Data Center area.
Supervisor
Used to select the person who will supervise the activity.
-
Next, fill out the form to add a user, which consists of several fields.
Field
Description
WP Type
Used to specify the type of Work Permit, such as INTERNAL.
NIK / No. Identitas
Used to enter the user’s NIK or ID number.
Name
Displays or is used to enter the user’s name.
Organization
Used to list the user’s organization or company.
Assignment Letter
Used to list or attach assignment letter information if necessary.
Search Icon
Used to search based on the entered NIK or ID number.
Delete Icon
Used to delete user data from the application.
-
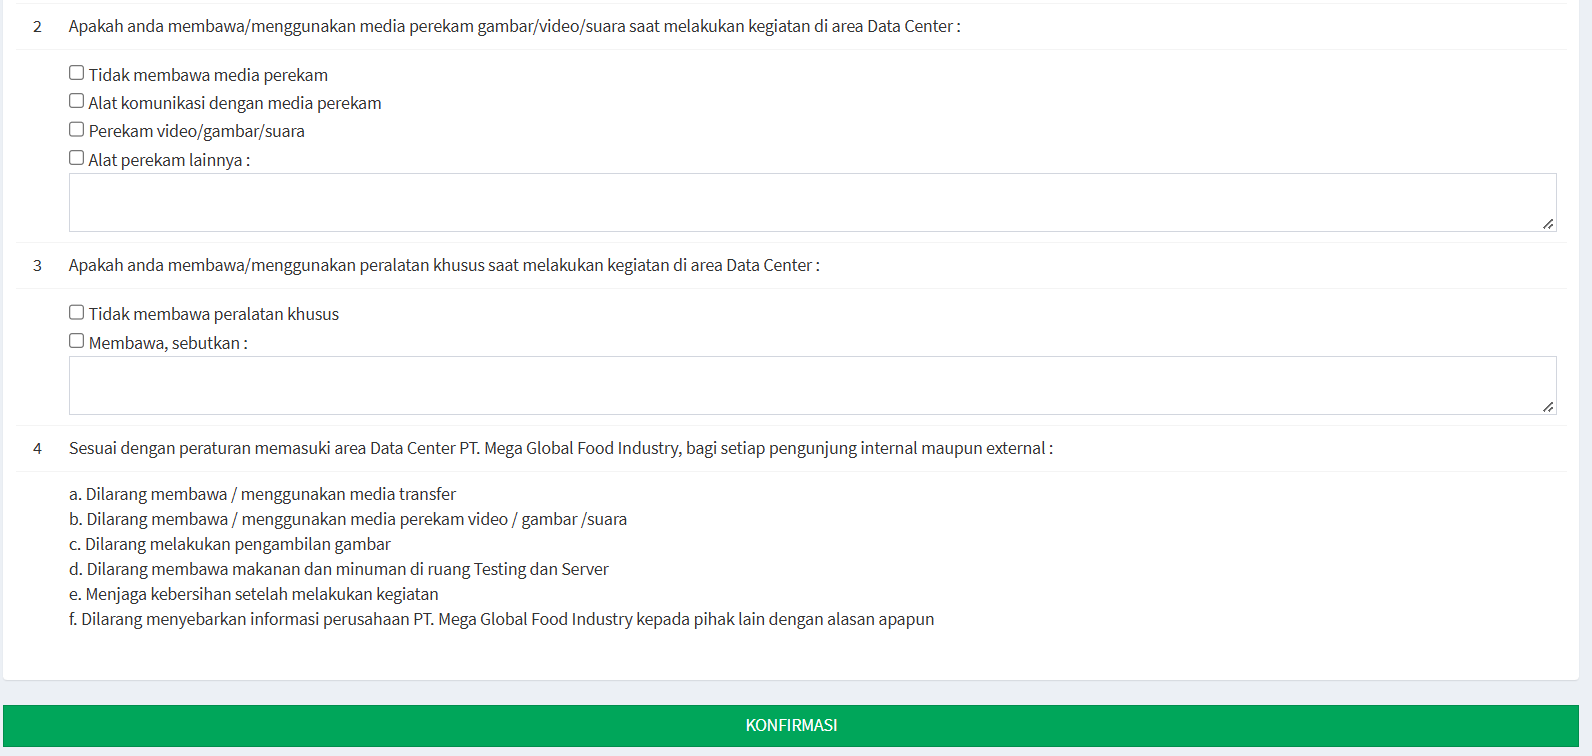
And finally, information regarding the conditions of the activity: After the activity and user data have been completed, there are several questions that need to be answered based on the conditions at the time the activity takes place. This section is used to provide information about items, devices, or equipment that will be brought or used while in the Data Center area.
-
Transfer Media / Removable Media: The first question concerns the use of transfer media or removable media during activities in the Data Center area.
-
Recording Media: The next question concerns media that can be used to record images, video, or audio.
- Specialized Equipment: Users must also provide information regarding the use of specialized equipment during the activity.
-
-
-
Rules for Entering the Data Center Area
At the end of the form, you’ll find information regarding the rules that must be observed when entering the PT. Mega Global Food Industry Data Center area, for both internal and external visitors. The rules listed in the system include:
-
Do not bring or use data storage devices
-
Do not bring or use video, image, or audio recording devices
-
Taking photographs is prohibited
-
Bringing food and beverages into the Testing and Server rooms is prohibited
-
Maintain cleanliness after completing activities
-
Disclosing PT. Mega Global Food Industry’s confidential information to third parties for any reason is prohibited
-
DATA REQUISITION
Access Requisition Module Guide
Module Location:
Access Requisition > Requisition > Data Requisition
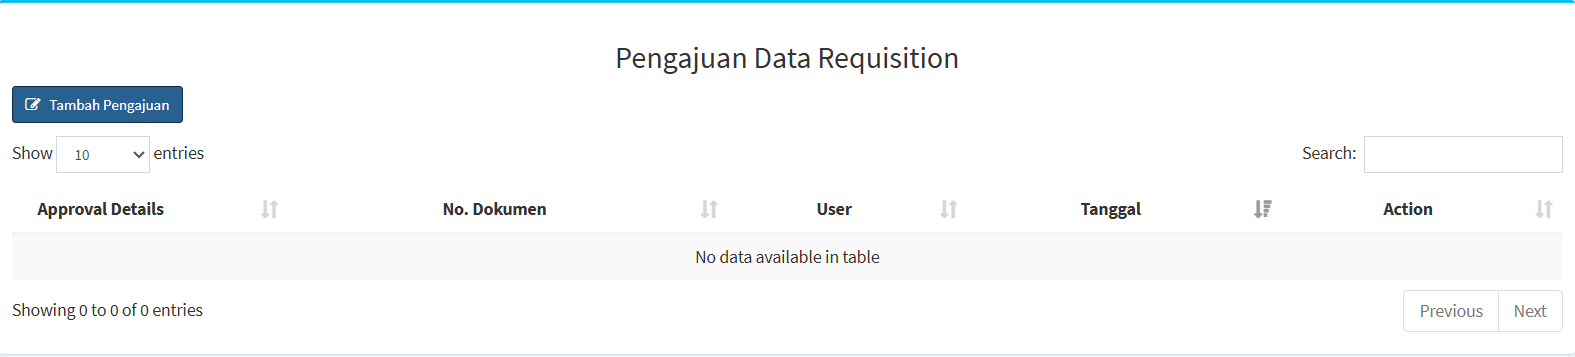
The Data Requisition menu is used to submit data requests through the Access Requisition system. Through this menu, you can create data requests by providing a description of the required data, as well as view a list of Data Requisition requests that have been created in the system.
- Main View

On the Data Requisition Request page, you can view a list of data requests available in the system. This page features several key functions, including the Add Request button, a list of requests, a search feature, and settings to adjust the number of records displayed.
- Screen Description
Section Description Add Request Used to create a new Data Requisition request. Show Entries Used to set the number of records displayed in the table. Search Used to search for specific request data. Approval Details Displays information about the request approval process or details. Dokumen No. Displays the document number of the Data Requisition request. User Displays the user associated with the request. Date Displays the date the request was created or recorded in the system. Action Displays the actions available for the request data. Previous / Next Used to navigate to the previous or next page of data. -
data requisition request
-
First, click the “Add Submission” button. Once clicked, the data requisition submission form will appear.
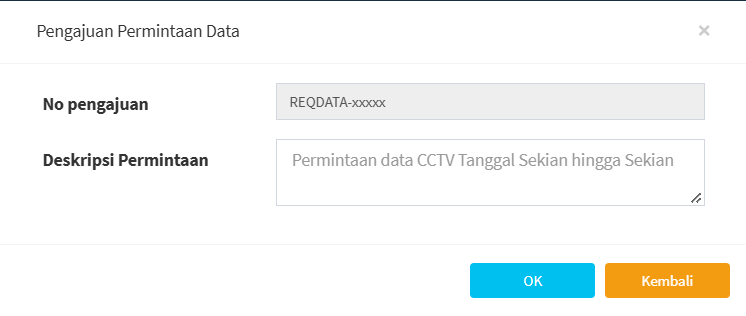
- After clicking the “Add Submission” button, the data requisition form will appear, which must be completed. The required information includes:

-
Submission No.: The identification number for the data requisition submission.
- Request Description: Used to explain the data required in the request.
-
-